Kubernetes 에서 Blue/Green 배포하는 방법을 알아보자.
Blue 와 Green 버전의 Container 이미지 만들기
Blue 버전의 Deployment 와 LoadBalancer 타입의 Service 배포
Green 버전의 Deployment 와 NodePort 타입의 Service 배포
Patch 로 Service EndPoint 변경
1. Blue 와 Green 버전의 Container 이미지 만들기
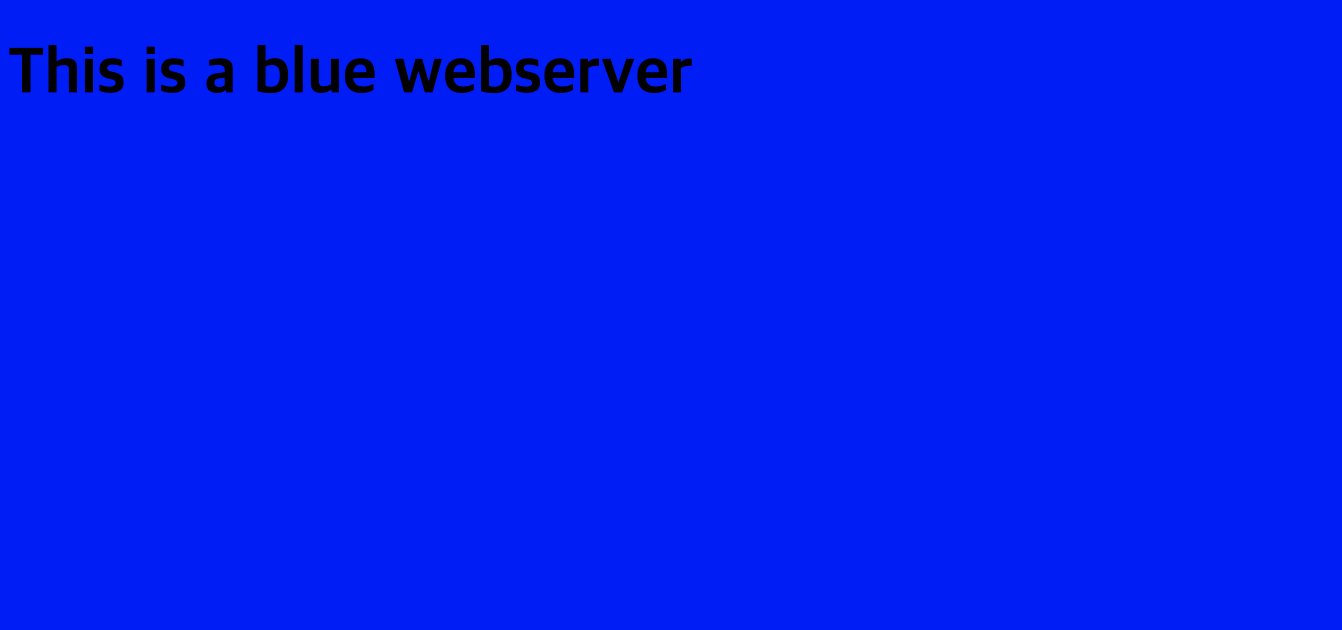
Container 이미지는 nginx 를 상속받아 쉽게 만들 수 있다. nginx 가 바라보는 web root 는 /usr/share/nginx/html 이므로 여기에 blue 버전을 표시할 수 있는 html 을 넣어준다.
index-blue.html
<!DOCTYPE html>
<html>
<body style="background-color:blue;">
<h1>This is a blue webserver</h1>
</body>
</html>
index-blue.html 을 index.html 로 변경하여 복사한다.
Dockerfile-blue
FROM nginx
COPY index-blue.html /usr/share/nginx/html/index.html
seungkyua/nginx:blue 이름과 태그를 갖는 Container 이미지를 만든다.
$ docker build -t seungkyua/nginx:blue -f Dockerfile-blue . 이미지가 정확한지 test 해본다.
$ docker run --rm -d -p 8080:80 --name nginx-blue seungkyua/nginx:blue

$ curl localhost:8080
<!DOCTYPE html>
<html>
<body style="background-color:blue;">
<h1>This is a blue webserver</h1>
</body>
</html>
이미지가 잘 확인되었으니 docker hub 에 push 한다.
$ docker login -u seungkyua
password:

$ docker push seungkyua/nginx:blue
같은 방식으로 Green 이미지를 만들어서 docker hub 에 push 한다.
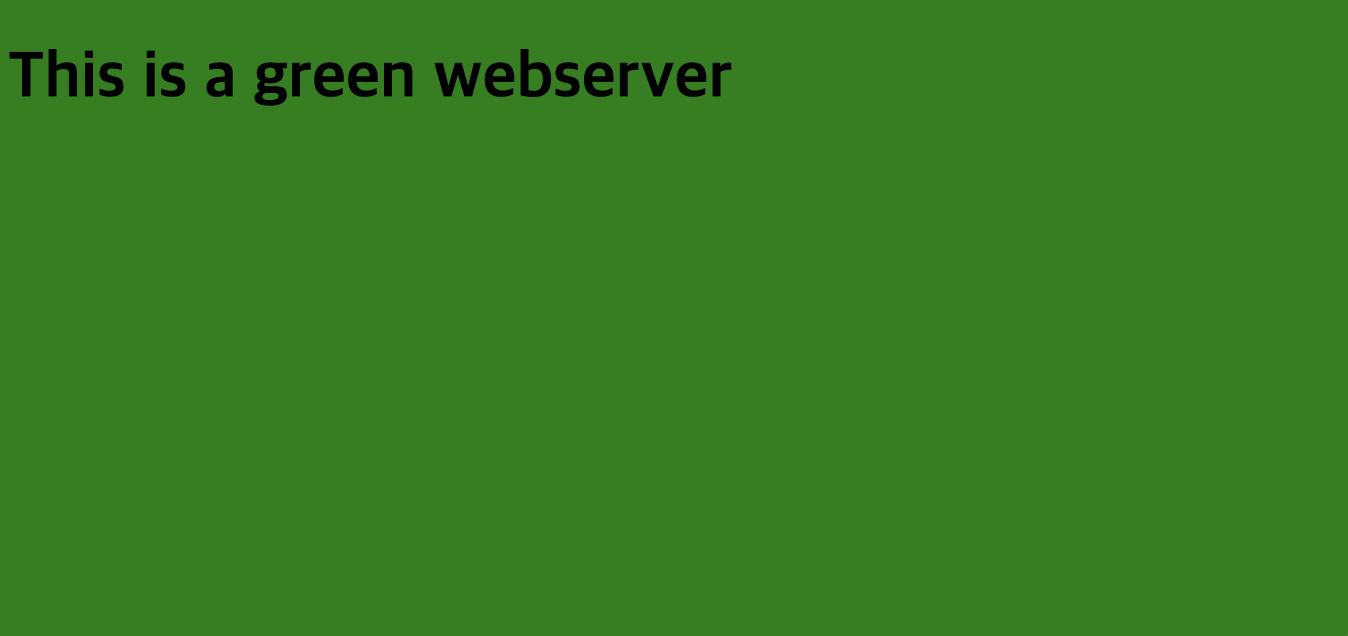
index-green.html
<!DOCTYPE html>
<html>
<body style="background-color:green;">
<h1>This is a green webserver</h1>
</body>
</html>
Dockerfile-green
$ cat Dockerfile-green
FROM nginx
COPY index-green.html /usr/share/nginx/html/index.html
$ docker build -t seungkyua/nginx:green -f Dockerfile-green .
$ docker push seungkyua/nginx:green2. Blue 버전의 Deployment 와 LoadBalancer 타입의 Service 배포
이미지가 준비되었으니 Blue 버전의 deployment 와 service yaml 을 만들어 배포한다.
nginx-blue-deploy.yaml
apiVersion: apps/v1
kind: Deployment
metadata:
  labels:
    app: nginx-blue
  name: nginx-blue
spec:
  replicas: 2
  selector:
    matchLabels:
      app: nginx-blue
      version: blue
  template:
    metadata:
      labels:
        app: nginx-blue
        version: blue
    spec:
      containers:
      - image: seungkyua/nginx:blue
        name: nginx
$ kubectl apply -f nginx-blue-deploy.yamlService 를 배포할 때는 Blue pod 의 label 을 selector 로 지정해 줘야 한다.
nginx-blue-green-svc.yaml
apiVersion: v1
kind: Service
metadata:
  labels:
    app: nginx-blue-green
  name: nginx-blue-green-svc
spec:
  ports:
  - port: 80
    protocol: TCP
    targetPort: 80
  selector:
    app: nginx-blue
    version: blue
  type: LoadBalancer
$ kubectl apply -f nginx-blue-green-svc.yamlblue version 은 웹 브라우저에서 접속하기 위해서 Service 를 LoadBalancer 타입으로 생성하였다.
$ kubectl get svc
NAME                   TYPE           CLUSTER-IP      EXTERNAL-IP                                                                  PORT(S)        AGE
kubernetes             ClusterIP      10.233.0.1      <none>                                                                       443/TCP        12d
nginx-blue-green-svc   LoadBalancer   10.233.30.78    aa1d4e1994e454eb5aea607cfdfd3dcf-23761053.ap-northeast-2.elb.amazonaws.com   80:32234/TCP   5m18s
웹브라우저에 접속하면 아래와 같이 blue 버전으로 접속이 된다.
3. Green 버전의 Deployment 와 NodePort 타입의 Service 배포
이제 새로운 버전인 Green 버전을 배포해 보자. image 와 label 을 잘 확인해야 한다.
nginx-green-deploy.yaml
apiVersion: apps/v1
kind: Deployment
metadata:
  labels:
    app: nginx-green
  name: nginx-green
spec:
  replicas: 2
  selector:
    matchLabels:
      app: nginx-green
      version: green
  template:
    metadata:
      labels:
        app: nginx-green
        version: green
    spec:
      containers:
      - image: seungkyua/nginx:green
        name: nginx
$ kubectl apply -f nginx-green-deploy.yamlService 는 Green 배포가 잘 되었는지 확인하기 위해서 Service 를 NodeType 으로 적용하였다.
nginx-green-svc.yaml
apiVersion: v1
kind: Service
metadata:
  labels:
    app: nginx-green
  name: nginx-green-svc
spec:
  ports:
  - port: 80
    protocol: TCP
    targetPort: 80
    nodePort: 32080
  selector:
    app: nginx-green
    version: green
  type: NodePort
$ kubectl apply -f nginx-green-svc.yamlgreen pod 가 떠 있는 노드를 확인한다.
여기서는 172.31.49.87 노드와 172.31.46.179 노드에 pod 가 생성되어 있다.
$ kubectl get pods -o wide
NAME                           READY   STATUS    RESTARTS   AGE    IP               NODE                                               NOMINATED NODE   READINESS GATES
nginx-blue-69dd468cf4-nts5h    1/1     Running   0          6m7s   10.233.114.152   ip-172-31-49-87.ap-northeast-2.compute.internal    <none>           <none>
nginx-blue-69dd468cf4-xvxqz    1/1     Running   0          6m7s   10.233.110.80    ip-172-31-46-179.ap-northeast-2.compute.internal   <none>           <none>
nginx-green-7df845c6cf-mpj6b   1/1     Running   0          8s     10.233.114.153   ip-172-31-49-87.ap-northeast-2.compute.internal    <none>           <none>
nginx-green-7df845c6cf-pvmrc   1/1     Running   0          8s     10.233.110.81    ip-172-31-46-179.ap-northeast-2.compute.internal   <none>           <none>
curl 명령어로 Green 이 정상적으로 배포되었는지 확인한다.
$ kubectl get svc
NAME                   TYPE           CLUSTER-IP      EXTERNAL-IP                                                                  PORT(S)        AGE
kubernetes             ClusterIP      10.233.0.1      <none>                                                                       443/TCP        12d
nginx-blue-green-svc   LoadBalancer   10.233.30.78    aa1d4e1994e454eb5aea607cfdfd3dcf-23761053.ap-northeast-2.elb.amazonaws.com   80:32234/TCP   5m18s
nginx-green-svc        NodePort       10.233.33.157   <none>                                                                       80:32080/TCP   12s
$ curl 172.31.49.87:32080
<!DOCTYPE html>
<html>
<body style="background-color:green;">
<h1>This is a green webserver</h1>
</body>
</html>4. Patch 로 Service EndPoint 변경
이제 LoadBalancer 타입으로 생성된 nginx-blue-green-svc 가 Green Pod 로 연결되게 selector 를 Green pod 가 선택되게 변경한다.
$ kubectl patch svc nginx-blue-green-svc -p '{"spec": {"selector": {"app": "nginx-green", "version": "green"}}}'웹브라우저로 접속하면 Green 으로 변경된 것을 확인할 수 있다.